
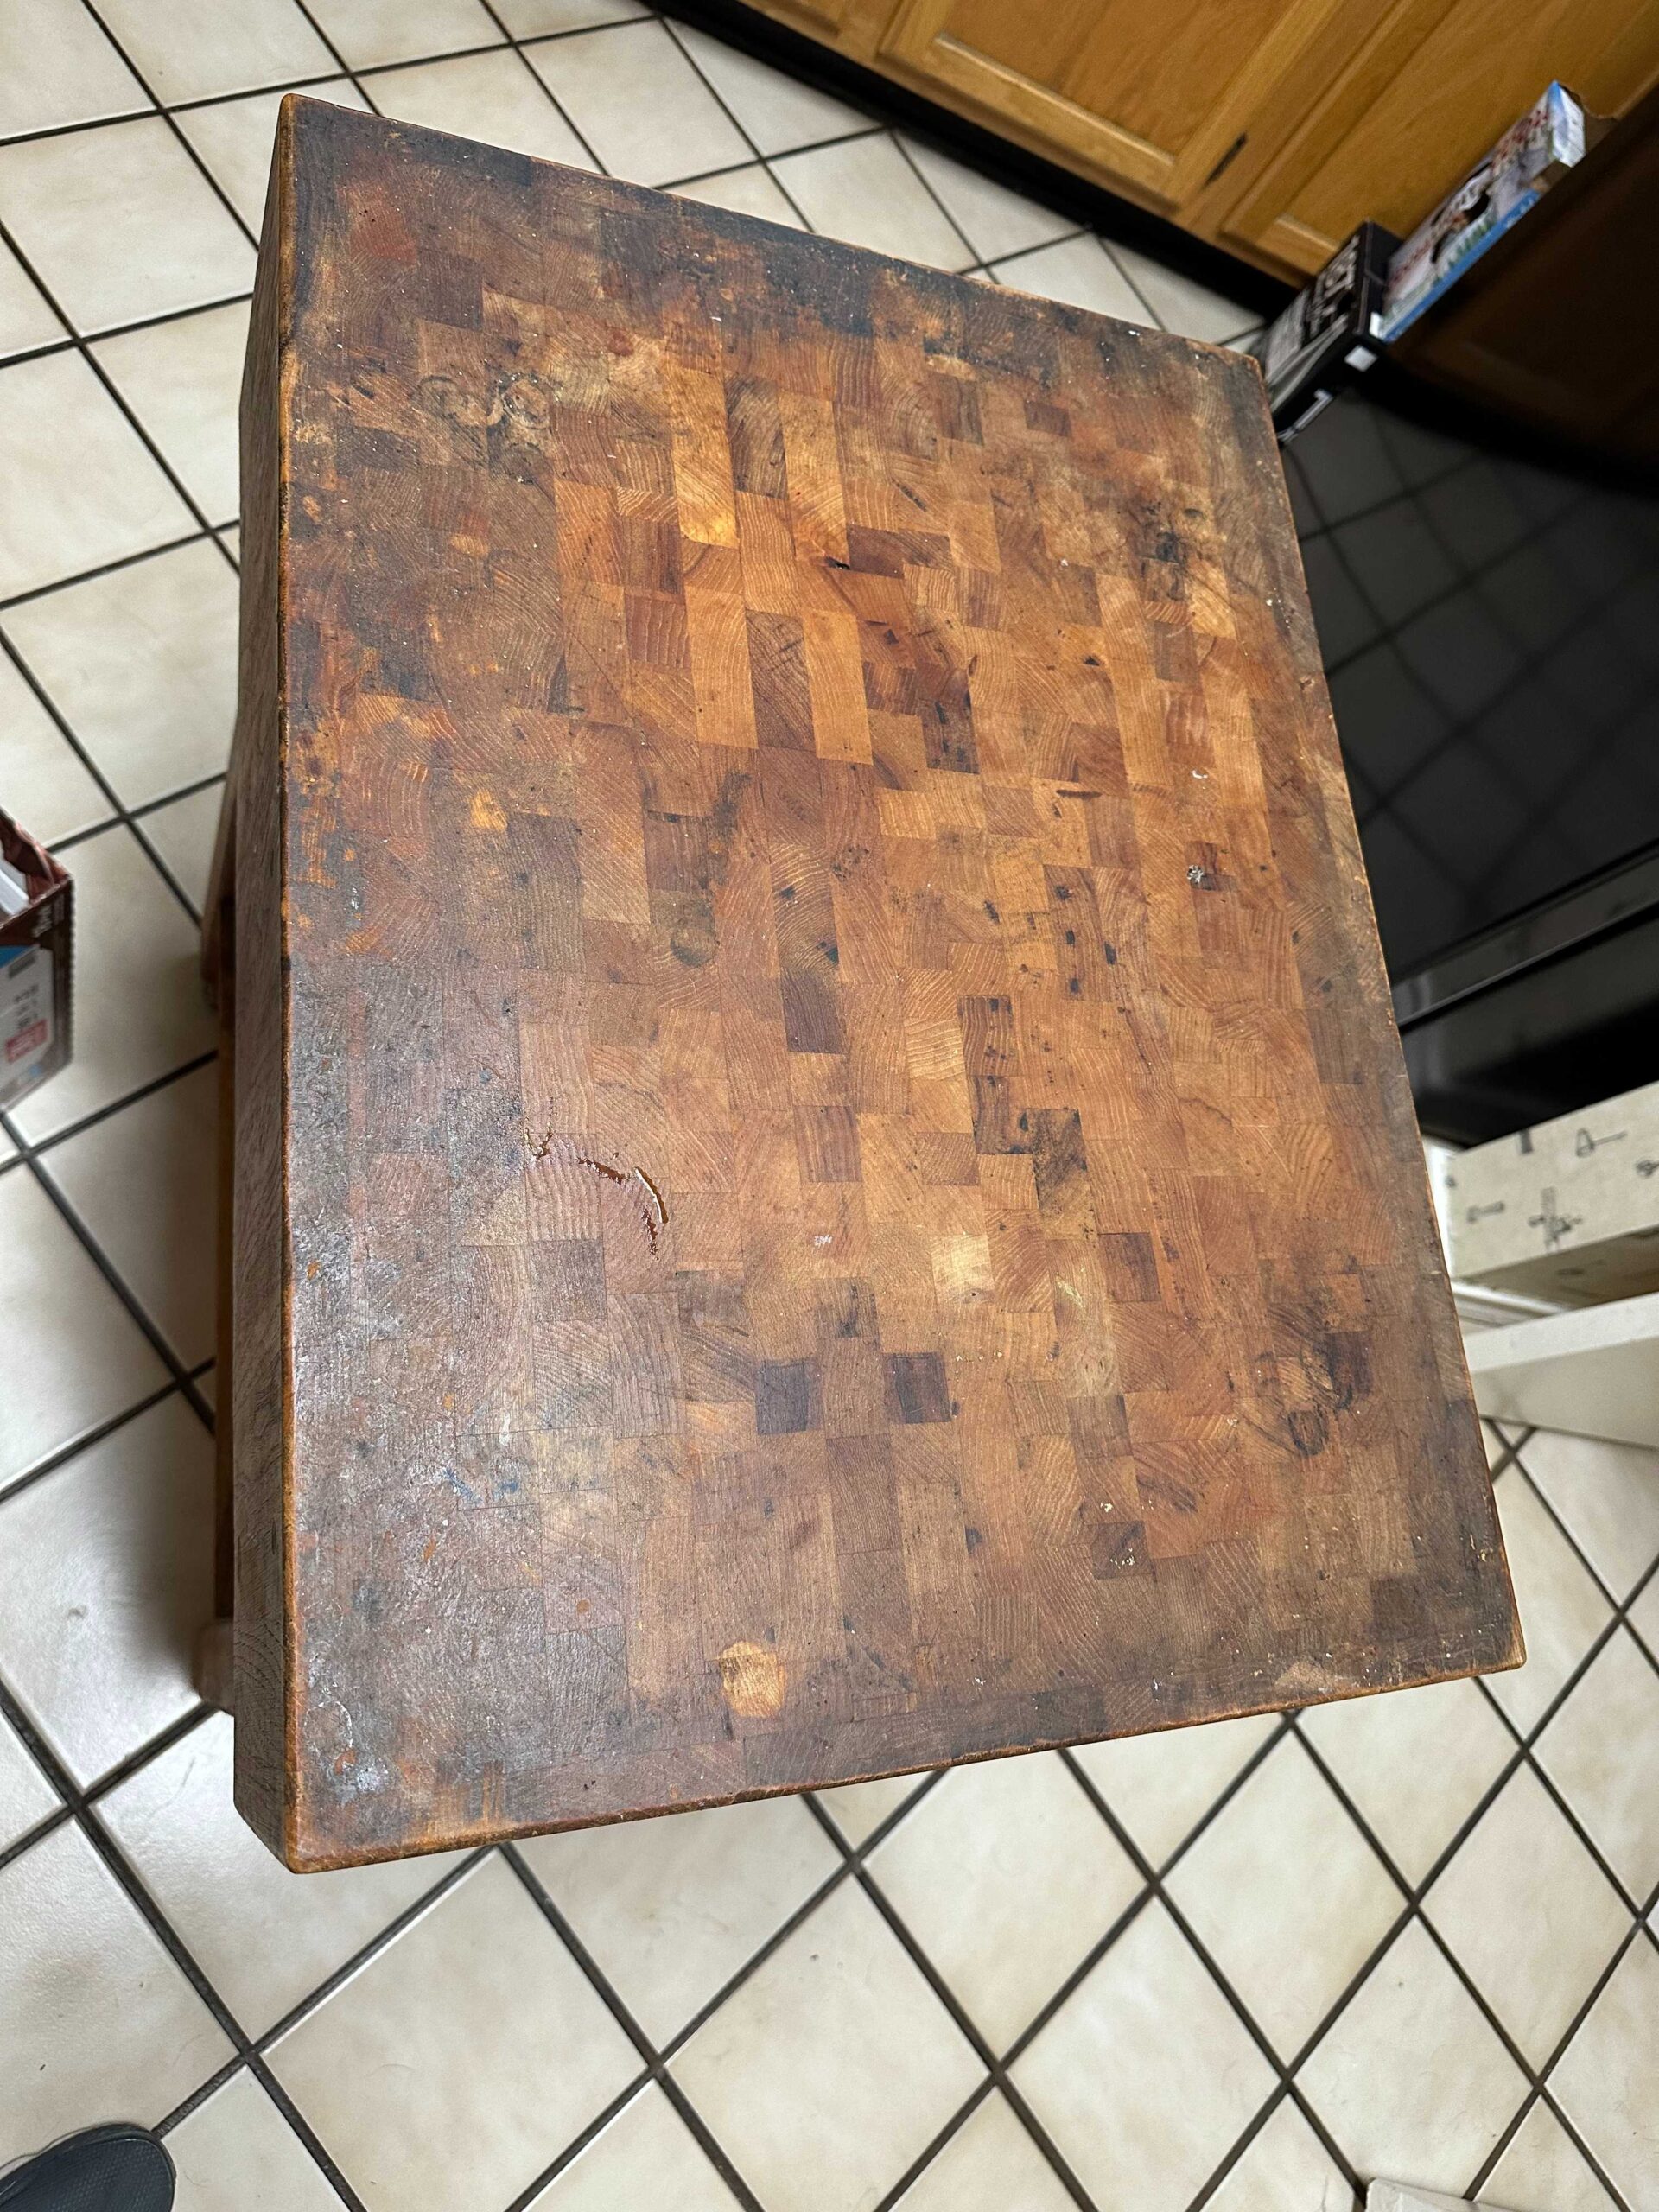
Most people do not call us about a butcher block until they have already given up on it. It sits in the corner of the kitchen doing its job, collecting stains and knife marks year after year, until one day they look at it properly and think: that thing is ruined.
It almost never is.
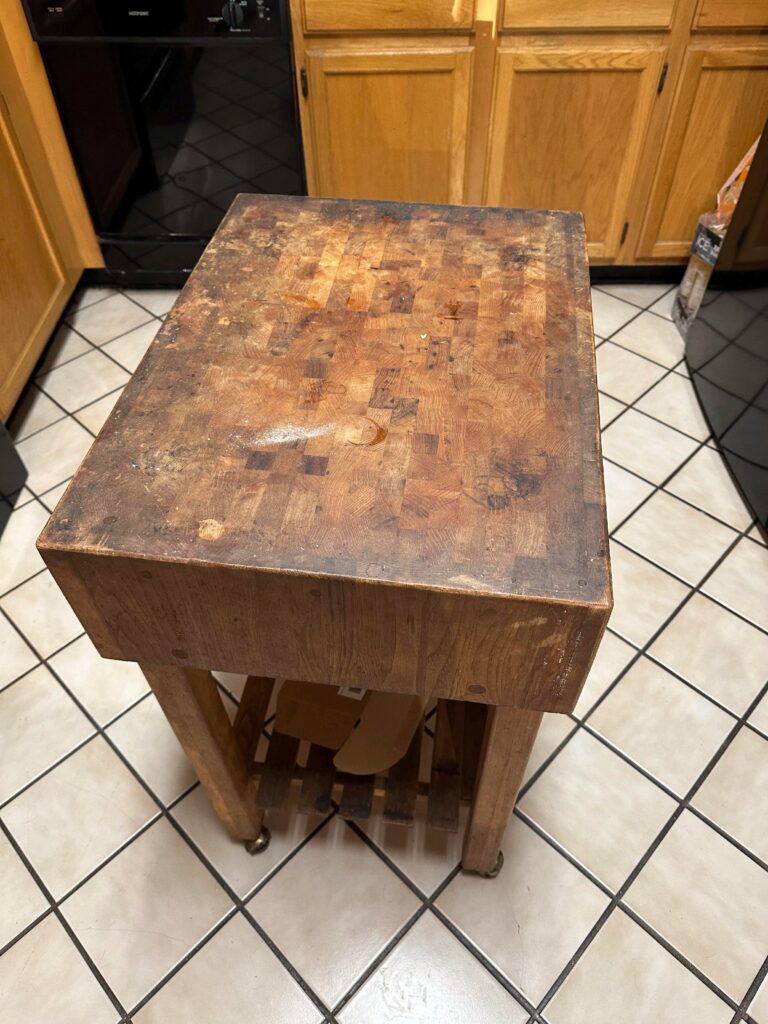
This piece came to our shop looking about as tired as solid wood gets – a heavy end-grain butcher block cart, grey and blotched across the top, with dark rings, paint flecks, and decades of grease worked deep into the grain. Underneath all of that was a beautifully built piece of oak furniture that had simply never been maintained. Here is what it took to bring it back.
The Piece: A Solid End-Grain Butcher Block Cart
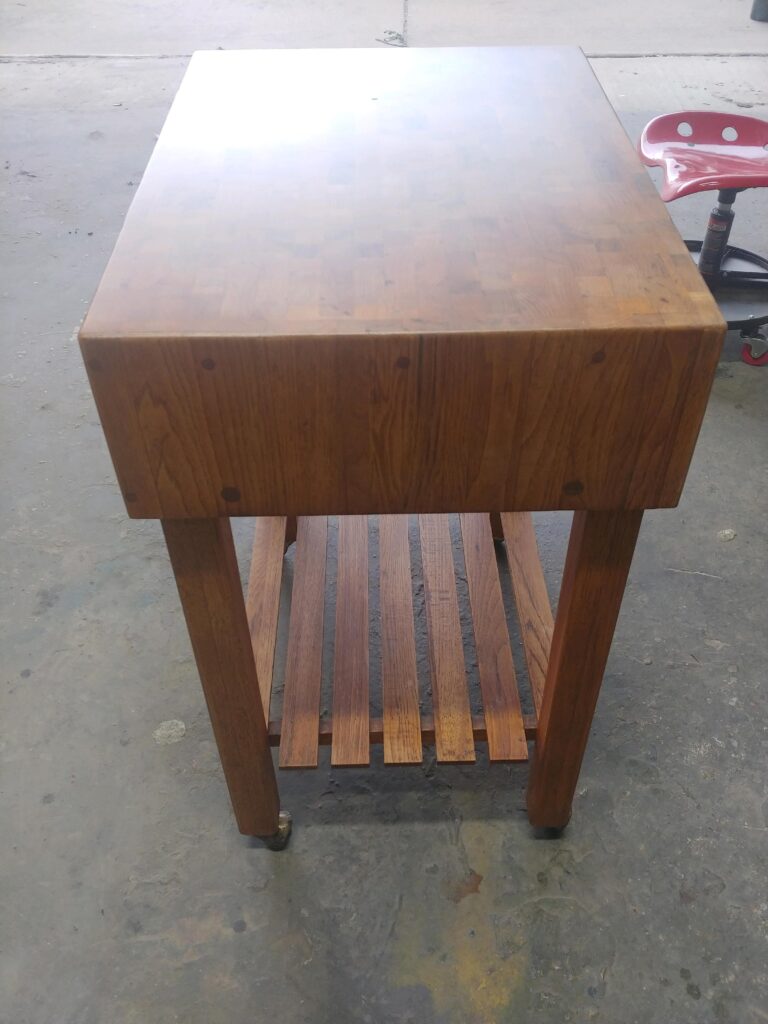
This is a classic butcher block on a stand – a thick end-grain top mounted on four square tapered legs with a slatted lower shelf and casters. The top is roughly four inches of laid-up hardwood, oak by the look of the ray fleck on the aprons, assembled in the checkerboard pattern that gives end grain its distinctive look.
That construction matters. End grain means the boards are stood on end so a blade cuts into the tips of the wood fibres rather than across them. The fibres part under the knife and close back up, which is why end-grain blocks are gentler on edges and far more durable than the edge-grain slabs sold as budget countertops. It is also why they soak up everything – oil, wine, water, dish soap – like a bundle of drinking straws standing upright.
A block like this is genuinely worth restoring. A comparable new one would cost more than the refinishing, and it would not have the density, the patina, or the joinery.
Before: What Decades of Kitchen Duty Look Like
Those photos are exactly how the piece arrived – no cleaning, no staging. Seen from above, the top had gone grey and blotchy, with dark staining, paint spatter, and grease worked deep into the open end grain.
The damage broke down into four categories, and each one gets handled differently:
- Surface grey. The top layer of wood had oxidised and gone silvery from UV and moisture. This is shallow – usually the first fraction of a millimetre.
- Deep staining. The dark rings and blotches were liquids that had wicked into the end grain, sometimes an eighth of an inch down. Sanding alone does not always reach these.
- Grease saturation. Cooking oils that never fully cure. This is the one that ruins a refinish if you do not deal with it, because a new finish will not bond over contaminated wood.
- Mechanical damage. Knife scoring, dents, paint flecks, and a few small chips at the edges. Straightforward, if tedious.
How We Refinished It, Step by Step
1. Assessment
Before any abrasive touches the wood, the piece gets checked over: are the legs still tight in their mortises, are the casters sound, is the top cupped or cracked, how much material can safely come off. A four-inch end-grain top has enormous reserves – you can take a serious amount off and still have decades of life left – but a thin edge-grain countertop may only have a millimetre or two to give.
2. Degreasing and stripping
The old finish and the surface contamination come off first. Sanding straight into a greasy top just drives the contamination deeper and clogs abrasives in seconds. The block gets stripped and cleaned back to bare, dry wood, then left to fully off-gas before anything else happens.
3. Flattening and sanding the end grain
This is the heart of the job, and end grain behaves nothing like face grain – it cuts unevenly, it glazes over if you lean on it, and it records every mistake permanently. The top is brought genuinely flat first, then worked through a full progression of grits, each one fully removing the scratch pattern of the one before it, with the surface cleaned and inspected under raking light between every pass.
Deep stains that survive the flattening get spot-treated and blended rather than chased with more sanding – chasing a stain is how a top ends up dished, and a dished top cannot be sanded back to flat without losing a great deal more wood than it needed to.
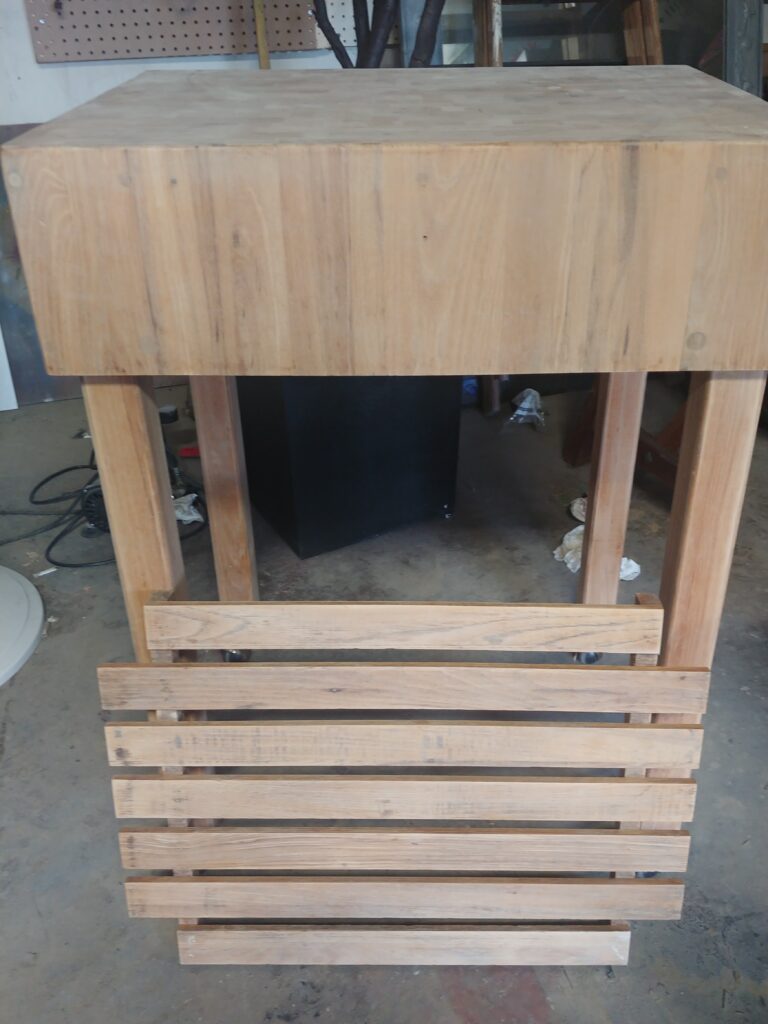
The legs, aprons, and slatted shelf are taken down and sanded by hand. The slats especially: each one has four faces and two ends, and no shortcut exists.
4. Colour and grain
Once the surface is clean and flat, the natural colour comes back on its own. The photos below are not stained – that warm honey-and-caramel checkerboard is just oak with the grey removed. Where a piece has irreparable dark patches, we colour-match and blend so the eye reads them as figure rather than damage.
5. Choosing the right finish
How you use the block decides the finish, and there is no single right answer.
- If you cut directly on it, it needs a food-safe penetrating finish: food-grade mineral oil, or an oil-and-beeswax blend. These soak in rather than sitting on top, they never chip or peel, and they are renewed by simply wiping more on every month or two. The trade-off is far less protection against water rings and staining.
- If it lives as a table, island, or work surface and the cutting happens on a board, a durable clear topcoat is the better choice. It builds a protective film that resists water, wine, and grease, keeps the surface easy to wipe down, and holds the colour of the wood. That is the route this piece took.
We ask how the piece is actually used before we specify anything. A block that gets a cleaver taken to it and a block that holds a stand mixer are two different jobs.
6. Curing
Finish goes on in thin, even coats with proper cure time between them, and the piece is not returned until it is genuinely hard – not just dry to the touch. Rushing this step is the most common reason a refinished top marks up again within a month.
After: The Result
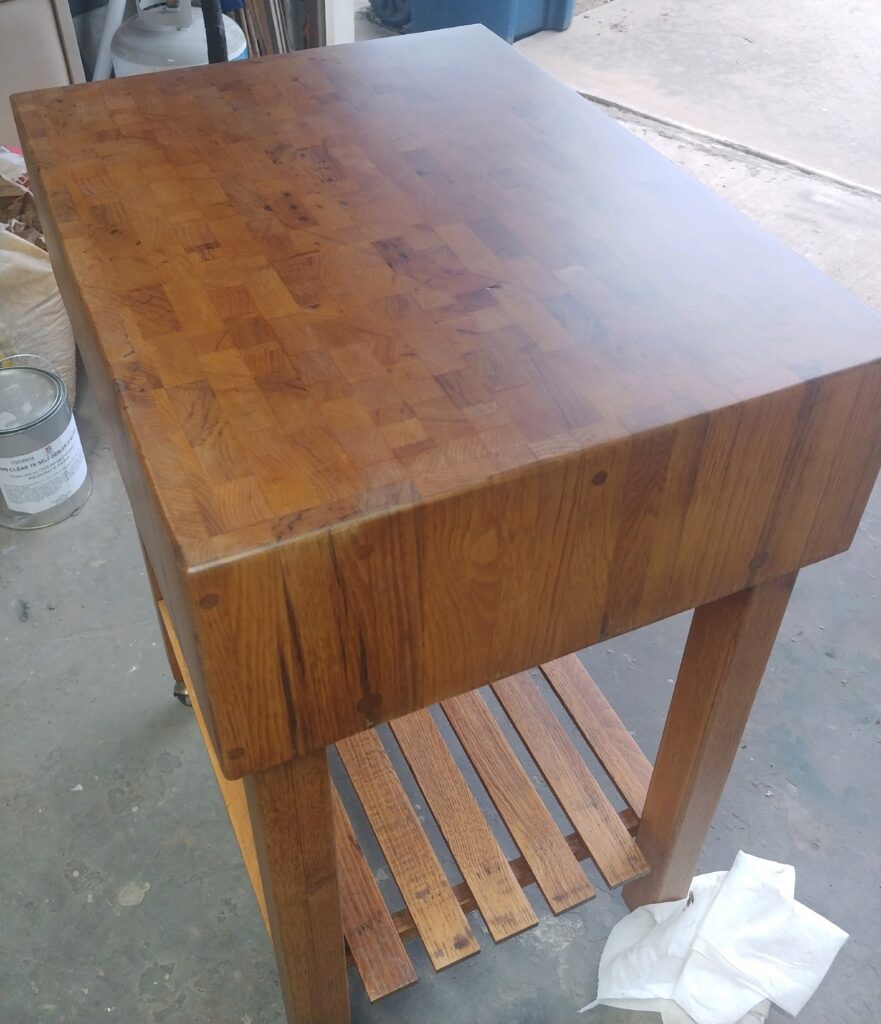
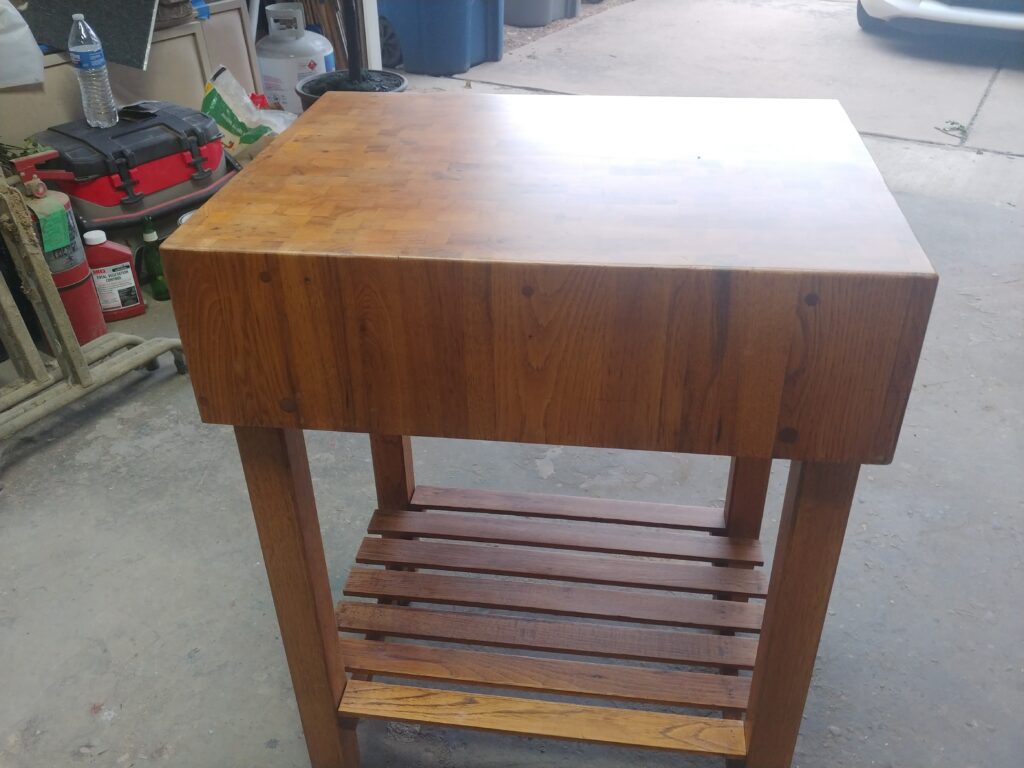
The dark staining is gone. The grey is gone. The knife scoring is gone. What is left is the piece the maker actually built – and with a maintained finish on it, it should outlast everything else in the kitchen.
Why a Block Like This Is Specialist Work
End grain is the most unforgiving surface in furniture work, and almost every way it goes wrong is permanent. These are the four failures we are working to avoid on every block that comes through the shop.
- A dished top. End grain cuts fast in the middle of a stroke and slow at the edges. Sand it freehand and the centre goes hollow – and once a top is dished, more sanding only deepens it. Flattening it again means taking the whole surface down to the low point, which is material you never get back.
- Burnished grain. Push too hard or run too fine too early and the open fibre ends close up and glaze over. Burnished end grain will not accept finish evenly. It shows up as pale, patchy areas after the first coat – by which point the only fix is to start over.
- Finish that will not bond. Cooking oil that has soaked into end grain does not sand out. If it is not drawn out properly first, the topcoat goes on beautifully and then lifts, stays tacky, or fisheyes weeks later.
- Scratch pattern under the coating. Skip a grit and the marks are invisible on bare wood – then light up like a road map the moment a clear finish goes over them. There is no correcting this without stripping back and starting the progression again.
Add a four-inch top worth of weight, the dust extraction a full flattening actually needs, and controlled conditions for the finish to cure in, and it stops being a garage job. This is what we are set up for, and it is why the result holds.
The other thing experience buys you is judgement: knowing how much material a given top can safely lose, which stains will lift and which need blending, whether a loose leg wants re-gluing or the joint needs to come apart. Those calls get made before the first abrasive touches the wood – and getting them wrong is what turns a repairable piece into a replaced one.
Frequently Asked Questions
Can a badly stained butcher block really be saved?
Almost always. Solid wood is thick, and staining is usually much shallower than it looks. The tops we genuinely cannot save are ones with structural failure – cracked laminations, severe cupping, or rot – not ones that simply look bad.
How much material comes off the top?
As little as necessary. On a thick end-grain block like this one, removing what is needed to flatten and clean the surface makes no meaningful difference to its life. On a thin countertop we are far more conservative.
Is the finish food safe?
It depends on what you choose. Food-grade mineral oil and oil and wax blends are safe for direct food contact and are what we recommend for active cutting surfaces. Film-forming topcoats are appropriate for blocks used as tables and work surfaces where food is not prepared directly on the wood. We walk you through both before we start.
Should I sand it down myself first to save money?
Please do not. Prep is the job – the sanding is the skilled part, not a shortcut to it. A top that has been sanded unevenly, burnished, or dished has to be taken down further than it otherwise would to get flat again, and that costs more, not less. Bring it to us as it is, however bad it looks.
Do you have to take my kitchen island away?
For most pieces, yes – sanding and finishing need controlled conditions and proper dust extraction. We offer pickup and delivery across the Dallas area.
How do I keep it looking like this?
Wipe spills promptly, never let standing water sit on it, and do not soak it. Oiled tops get re-oiled every month or two; sealed tops just need wiping down. Both should stay out of direct, all-day sun. We give you care instructions specific to the finish on your piece.
How long does butcher block refinishing take?
It varies with the condition of the piece and the finish you choose – cure times are the main driver, not labour. We give you a realistic window with your estimate rather than a number we cannot hold to.
Have a Butcher Block Worth Saving?
We are a Dallas-area wood and furniture refinishing studio, and this is exactly the kind of work we do: butcher block tops and islands, antique and heirloom furniture, dining tables, cabinetry, doors, and built-ins. English-trained craftsmanship, honest advice about whether a piece is worth restoring, and pickup and delivery available across the area.
Estimates are free. Send a few photos of your piece using the form below and we will tell you exactly what it needs, what we would do, and what it would cost. However far gone it looks – that is usually not the problem you think it is.
Prefer to talk it through? Call (469) 371-1468 or email Phil@TheEnglishRefinisher.com.
Serving Dallas, Wylie, Highland Park, University Park, Preston Hollow, Lakewood, and surrounding communities – by appointment.
Leave a Reply